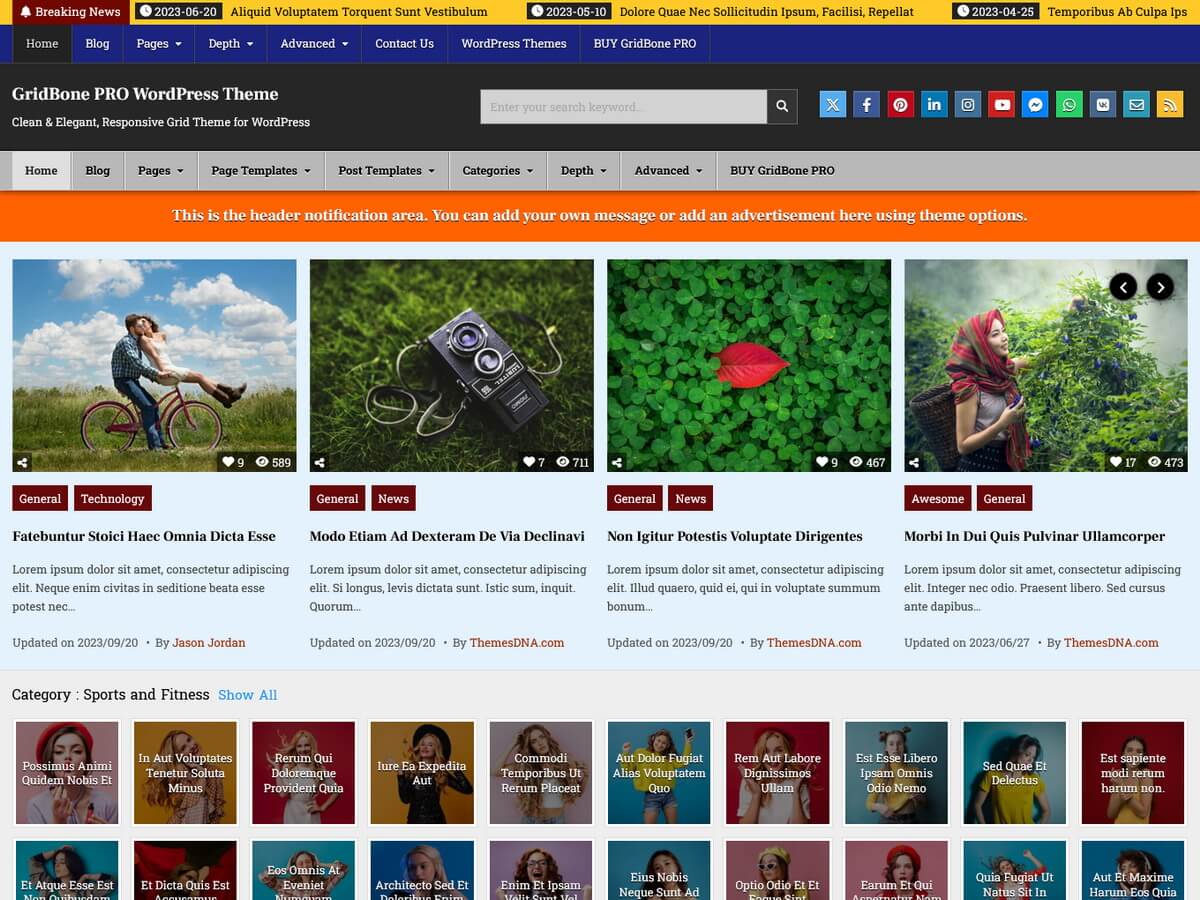
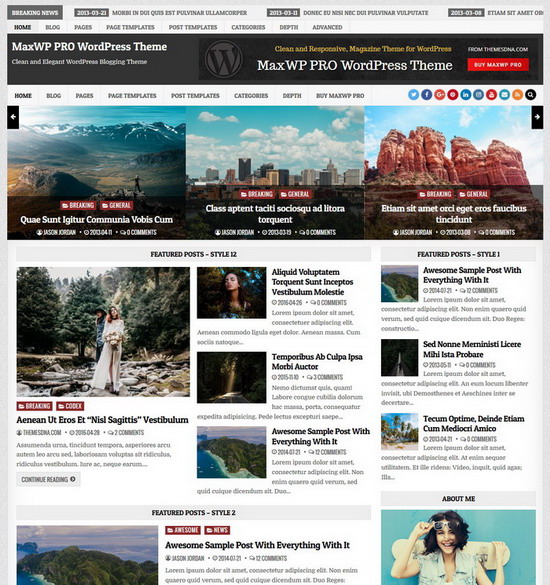
GridBone PRO WordPress Theme
GridBone PRO vs. Themes Bundle
- 1 PRO Theme (GridBone PRO).
- Use on unlimited websites.
- One-time Payment. No renewal Fees. Lifetime Updates.
- Current Version: 1.0.2
- All 56 PRO Themes ($1400 worth of themes for just $75).
- Use on unlimited websites.
- One-time Payment. No renewal Fees. Lifetime Updates.
- Access to All Future PRO Themes for Free.
GridBone PRO Theme Features
Color Options
Font Options
Responsive Design
Layout Options
Featured Posts Widgets
Custom URL for Grid Posts
Custom Thumbnails for Grid Posts
Lightbox for Grid Thumbnails
10+ Custom Page Templates
Individual Settings Panels
Unique Header Images
Header Options
Logo Options
Trending News Ticker
Menu Options
About & Social Widget
More Widget Areas
Post Likes & Post Views
Related Posts
60+ Social Buttons
25+ Share Buttons
Infinite Scroll & Load More
Author Bio Box
Grid & Single Post Ads
E-commerce
Breadcrumbs Support
Contact Form
Search Engine Optimized
Custom CSS
Footer Options
No Designer Credits
Copyright Text
Sticky Menu & Sidebars
Random Posts Button
More Theme Options
RTL Language Support
Translation Ready
Latest WP Version Ready
Cross Browser Compatible
HTML5 & CSS3
Clean & Secure Codes
Regular Updates
Incredible Support
Affordable Price
One-time Fee! No Renewals
100% GPL License
Well Documented
Elegant Design
GridBone vs. GridBone PRO
| Features | GridBone | GridBone PRO |
|---|---|---|
| Color Options | ✖ | ✔ |
| Font Options | ✖ | ✔ |
| Custom URL Support for Grid Posts | ✖ | ✔ |
| Featured Image URL Support for Grid Posts | ✖ | ✔ |
| Custom Thumbnail Support for Grid Posts | ✖ | ✔ |
| Custom Title Support for Grid Posts | ✖ | ✔ |
| Lightbox Feature for Grid Thumbnails | ✖ | ✔ |
| Open Grid Posts in New Windows/New Tabs | ✖ | ✔ |
| Add Nofollow Attribute to Grid Post URLs | ✖ | ✔ |
| Boxed or Full Layout Type | ✖ | ✔ |
| 10+ Layout Styles for Posts and Pages | ✖ | ✔ |
| 10+ Layout Styles for Non-singular Pages | ✖ | ✔ |
| 8 Header Layouts | ✖ | ✔ |
| Width Options for Full Site/Main Content/Left Sidebar/Right Sidebar | ✖ | ✔ |
| Website Width/Layout Type/Layout Style/Header Style/Footer Columns Options for Each Post/Page | ✖ | ✔ |
| Grid Featured Posts Widget (Recent/Categories/Tags/PostIDs based) | ✖ | ✔ |
| List Featured Posts Widget (Recent/Categories/Tags/PostIDs based) | ✖ | ✔ |
| Tabbed Widget (Recent/Categories/Tags/PostIDs based) | ✖ | ✔ |
| About and Social Widget - 60+ Social Buttons | ✖ | ✔ |
| 10+ Custom Page Templates | ✖ | ✔ |
| 10+ Custom Post Templates | ✖ | ✔ |
| Setting Panel for Each Post | ✖ | ✔ |
| Setting Panel for Each Page | ✖ | ✔ |
| Display Ads/Custom Contents Between Grid Posts | ✖ | ✔ |
| News Ticker (Recent/Categories/Tags/PostIDs based) | ✖ | ✔ |
| Featured Posts Slider (Recent/Categories/Tags/PostIDs based) | ✖ | ✔ |
| Different Header Image + Title + Description for Each Post/Page | ✖ | ✔ |
| Different Header Notifications for Each Post/Page | ✖ | ✔ |
| Different Footer Notifications for Each Post/Page | ✖ | ✔ |
| 6 Footer Layouts (1/2/3/4/5/6 Columns) | ✖ | ✔ |
| Related Posts (Categories/Tags/Author/PostIDs based) | ✖ | ✔ |
| Header Social Buttons - 60+ Social Buttons | ✖ | ✔ |
| Post Share Buttons - 25+ Share Buttons | ✖ | ✔ |
| Posts Views Counter | ✖ | ✔ |
| Posts Likes System | ✖ | ✔ |
| Built-in Infinite Scroll and Load More Button | ✖ | ✔ |
| Post Navigation with Thumbnails | ✖ | ✔ |
| Author Bio Box with Social Buttons | ✖ | ✔ |
| More Widget Areas | ✖ | ✔ |
| Enable/Disable Mobile View from Primary, Secondary and Header Menus | ✖ | ✔ |
| Different Ads under Post Title and under Post Content for Each Post | ✖ | ✔ |
| Different Header Background Image Support for Each Post/Page | ✖ | ✔ |
| Different Footer Background Image Support for Each Post/Page | ✖ | ✔ |
| Built-in Contact Form | ✖ | ✔ |
| Random Posts Button | ✖ | ✔ |
| Priority Support | ✖ | ✔ |
| WooCommerce Compatible | ✔ | ✔ |
| Yoast SEO Breadcrumbs Support | ✔ | ✔ |
| Theme Options | ✔ | ✔ (more options) |
| Custom Logo Support | ✔ | ✔ |
| Header Image Support | ✔ | ✔ (more options) |
| Background Image Support | ✔ | ✔ |
| RTL Language Support | ✔ | ✔ |
| Translation Ready | ✔ | ✔ |
| Latest WP Version Compatible | ✔ | ✔ |
| Sticky Menu | ✔ | ✔ |
| Sticky Sidebars | ✔ | ✔ |
| Footer Widgets | ✔ | ✔ |
| Clean Codes / No Encrypted Scripts | ✔ | ✔ |
| Lifetime Theme Updates | ✔ | ✔ |
| For Unlimited Domains | ✔ | ✔ |
GridBone PRO Theme Options
Questions & Answers - GridBone PRO
How to install GridBone PRO theme?
- Download the zip file of the purchased template clicking on the download link sent to your email address.
Note: If you can not find it in your inbox, please check your spam folder. But if you still can not find this email or download link is broken, please inform us using our contact form. we will send it ASAP. - Go to "WordPress Dashboard" -> "Appearance" -> "Themes" and click on "Add New" button.
- Click on "Upload Theme" button and choose the zip file you have downloaded.
- Click on "Install Now" button.
- Activate the theme.
- Now go to "Appearance" -> "Customize" to configure theme options.
How to regenerate thumbnails?
After installing and activating this theme, the first thing you need to do is regenerate thumbnails from all your featured images to match this theme.
- Install and activate the "Regenerate Thumbnails" plugin.
- From the left hand navigation menu, click "Tools" -> "Regenerate Thumbnails".
- On the next screen, click on the specific button to generate thumbnails for all attachments.
- Now wait until regenerate process is complete.
How to add featured images for posts?
Adding a featured image to a post or page is very easy. If you do not know how to do that, please follow this guide: How to Add Featured Images in WordPress
How do I access the theme options?
Go to "Appearance" -> "Customize" -> "Theme Options" to access the theme options.
How to add featured posts widgets / custom widgets?
GridBone PRO has featured posts widgets, a tabbed widget, a grid ad widget, and an about-social widget.
Featured posts widgets can be used to display recent posts, category posts, tag posts, or posts based on post ids. These posts can be ordered according to the number of comments, published date, modified date, post likes, post views, or random order.
Go to "Appearance" -> "Widgets".
Drag and drop these widgets to suitable widget areas and set widget options.
How to apply a custom page template?
This theme has custom page templates for posts and pages.
Follow this guide if you do not know how to apply a custom page for a post/page:
How do I setup menus?
Just after installing the theme it will display the pages as the default menus. You can add your own links, categories, pages for the menu.
This theme includes 3 menu location options: Header Menu, Primary Menu, Secondary Menu
- To create a menu, go to "Appearance" > "Menus" and click on the "create a new menu" link.
- Give a name to your menu and click on the "Create Menu" button.
- To add menu items, simply select options in the left side column by checking the box for pages, posts, categories, tags etc that you want to include and then click on the "Add to Menu" button.
- To create menu drop-downs, simply nest your drop-down menu links below the menu item under which you want them to appear.
- When you are done adding links, select a menu location by checking one of the options listed under "Display location" and save your menu.
How do I create a featured content page?
Instead of the actual content added by the page editor, a Featured content page displays featured posts widgets. With this theme, you can create an unlimited number of featured content pages. You can also make a featured content page your homepage.
More info: How to Create a Featured Content Page
How to upload a site icon?
Site Icons are what you see in browser tabs, bookmark bars, and within the WordPress mobile apps.
Note: Site Icons should be square and at least 512 × 512 pixels.
- Go to "Appearance" -> "Customize" -> "Theme Options" -> "Site Identity".
- Click on the "Select site icon" button.
- Click on the "Upload Files" tab of the upload screen.
- Now upload your site icon clicking on the "Select Files" button from the upload screen.
- Click on the "Publish" button at the top of the Customizer if you are satisfied with your site icon.
How to upload a logo?
Adding a custom logo is very easy. Please use the following steps.
- Go to "Appearance" -> "Customize" -> "Theme Options" -> "Site Identity".
- Click on the "Select logo" button.
- Click on the "Upload Files" tab of the upload screen.
- Upload your logo clicking on the "Select Files" button from the upload screen.
- Click on the "Publish" button at the top of the Customizer if you are satisfied with your logo.
How to upload a header image?
You can upload a site-wide header image easily going to "Appearance" -> "Customize" -> Theme Options -> "Header Image".
With the PRO version, you can also add a different header image to each post and page.
Mode info: How to Add a Header Image
How to add or change site background image?
You can add/change/remove site background image going to "Appearance" -> "Customize" -> Theme Options -> "Background Image".
How do I change the layout type?
- Go to "Appearance" -> "Customize" -> "Theme Options" -> "Layout Options".
- Choose "Boxed" or "Full" layout type using the "Layout Type" option.
Also, you can set a specific layout type for each post and page.
- Layout type setting for post :
Post's edit screen -> "Post Settings - GridBone PRO" meta box -> "Layout Type" - Layout type setting for page :
Page's edit screen -> "Page Settings - GridBone PRO" meta box -> "Layout Type"
Note: These settings will override the Customizer layout options.
How do I change the layout style?
This theme has separate layout styles for singular pages and non-singular pages.
Singular pages: single post of any post type (post, attachment, page, custom post types).
Non-singular pages: homepage, category pages, tag pages, archive pages, ...
- Go to "Appearance" -> "Customize" -> "Theme Options" -> "Layout Options".
- Use "Singular Layout Style" and "Non-Singular Layout Style" options to change the layout style as you like.
Also, you can set a specific layout style for each post and page.
- Layout style setting for post :
Post's edit screen -> "Post Settings - GridBone PRO" meta box -> "Layout Style" - Layout style setting for page :
Page's edit screen -> "Page Settings - GridBone PRO" meta box -> "Layout Style"
Note: These settings will override the Customizer layout options.
How do I change the header layout?
- Go to "Appearance" -> "Customize" -> "Theme Options" -> "Header Options".
- Choose a header layout style using the "Header Layout" option.
How do I enable the news ticker?
- Go to "Appearance" -> "Customize" -> "Theme Options" -> "News Ticker Options".
- Mark the option "Enable News Ticker" and set the other options for the news ticker.
How to add a custom URL / custom title / custom image address to a grid post?
You can add the above values to a grid post by going into the edit screen of that post.
- Find the "Post Settings – GridBone PRO" options panel located at the bottom of the edit screen.
- - If you can't see it and if you are using the Block editor, you can enable the "Post Settings - GridBone PRO" panel through "Preferences" -> "Panels" -> "Additional".
- - If you can't see it and if you are using the Classic editor, you can enable the "Post Settings - GridBone PRO" panel through the "Screen Options" panel.
- Enter a custom URL into the grid post using the "Custom URL" text input.
- Enter a custom title into the grid post using the "Custom Title" text input.
- Enter a custom image address into the grid post using the "Custom Image Address" text input.
- Finally update your post.
How to Enable Custom URLs in Grid Posts
By default, a grid post is linked to its post URL. However, with the PRO version, you can link a grid post to any URL you want.
If you've already added custom URLs to your grid posts, you can enable them as follows:
- Go to "Appearance" -> "Customize" -> "Theme Options" -> "Posts Grid Options".
- Select the "Custom URL" value for the "Grid URLs Type" option and click on the "Publish" button.
How to Display Custom Titles in Grid Posts
By default, a grid post displays its post title as the grid title. However, with the PRO version, you can display any text as the title of a grid post.
If you've already added custom titles to your grid posts, you can display them as follows:
- Go to "Appearance" -> "Customize" -> "Theme Options" -> "Posts Grid Options".
- Select the "Custom Title" value for the "Grid Titles Type" option and click on the "Publish" button.
How to Display Custom Images in Grid Posts
By default, a grid post displays a thumbnail of its featured image. However, with the PRO version, you can display any image as a thumbnail using the URL of that image.
If you've already added custom image addresses to your grid posts, you can display them as follows:
- Go to "Appearance" -> "Customize" -> "Theme Options" -> "Posts Grid Options".
- Select the "Custom Image Address" value for the "Grid Thumbnails Type" option and click on the "Publish" button.
How to Enable the Lightbox Feature to Grid Thumbnails
By default, a grid post is linked to its post URL. However, when you link a grid post to its featured image URL, you can use the lightbox feature of the theme. But this is possible only with the PRO version.
- Go to "Appearance" -> "Customize" -> "Theme Options" -> "Posts Grid Options".
- Select the "Featured Image URL" value for the "Grid URLs Type" option.
- Check the option "Enable Lightbox Feature for Grid Thumbnails" and click on the "Publish" button.
How to Open Grid Links in a New Window or Tab
- Go to "Appearance" -> "Customize" -> "Theme Options" -> "Posts Grid Options".
- Check the option "Open Grid URLs in a New Window or Tab" and click on the "Publish" button.
How to Add "Nofollow" Attribute to Grid Links
- Go to "Appearance" -> "Customize" -> "Theme Options" -> "Posts Grid Options".
- Check the option "Add "Nofollow" Attribute to Grid URLs" and click on the "Publish" button.
How do I activate the infinite scroll feature?
- Go to "Appearance" -> "Customize" -> "Theme Options" -> "Posts Navigation Options".
- Choose "Infinite Scroll" value for the "Posts Navigation Type" option.
- Click on the "Publish" button.
How do I activate the load more feature?
- Go to "Appearance" -> "Customize" -> "Theme Options" -> "Posts Navigation Options".
- Choose "Load More Button" value for the "Posts Navigation Type" option.
- Click on the "Publish" button.
How do I change the footer layout?
- Go to "Appearance" -> "Customize" -> "Theme Options" -> "Footer Options".
- Choose a footer layout style using the "Number of Footer Columns" option.
How do I remove the designer credit link?
- Go to "Appearance" -> "Customize" -> "Theme Options" -> "Footer Options".
- Check the "Hide Theme Designer Credits" option.
How to add my own copyright message?
- Go to "Appearance" -> "Customize" -> "Theme Options" -> "Footer Options".
- Add your own copyright message to the "Footer copyright notice" text input.
How to change the number of posts per page?
This is not a theme specific setting.
Follow this guide to change the number of posts per page: How to Change the Number of Posts Per Page in WordPress
How to translate this theme into my language?
You can easily translate this theme using the "Poedit" software or the "Loco Translate" plugin.
More info:
How to translate a WordPress theme with Poedit software
How to translate a WordPress theme with Loco Translate plugin
What is the difference between "WordPress.org" and "WordPress.com"?
WordPress.org is the self-hosted version, which you can use to create and maintain a website on your own, whereas WordPress.com is a hosted blogging service that assists you in creating a website using the WordPress software.
Can I use this theme with WordPress.org websites?
- Yes. All our themes are working with any self-hosted WordPress installation.
Can I use this theme with WordPress.com websites?
- Yes. But if you need to upload a theme to a WordPress.com website, you will need to have their "Business" or "eCommerce" plan. If your site has one of their legacy plans, it is available on the "Pro" plan.
Can I use this theme on multiple websites?
Can I use your themes for a commercial project?
Can you help me install the theme I bought?
Yes, we can install the theme for free on your domain. Send us an email. We will respond with instructions on how to proceed.
What is the support schedule?
You can email us directly & we will get back to you ASAP. Our general support hours are Monday to Friday, 06:30 to 20:00 (GMT+5). During this time, support queries will be answered in 1-12 hours (usually much quicker). On weekends it may take a bit longer to receive a response.
How to import GridBone PRO demo content?
Follow the steps given below to import GridBone PRO theme demo content, widgets and Customizer settings.
- First download and save this "gridboneprowordpresstheme.WordPress.2023-07-13.xml" file into your hard drive.
- Go to "Tools" -> "Import".
- In the "WordPress" section, if you have not already installed the importer, click "Install Now".
- When the installation is finished, click "Run Importer".
- Click on "Choose File" and select previously saved "gridboneprowordpresstheme.WordPress.2023-07-13.xml" file from your hard drive.
- Click on "Upload file and import" button.
- Now you will be asked to map the authors in the export file to users on your website. For each author, you may choose to map to an existing user on your website or to create a new user.
- Check the option "Download and import file attachments".
- Click on "Submit" button.
- To display different widgets in different pages, first install and activate the "Widget Display Conditions" plugin.
- Now install and activate the "Widget Importer & Exporter" plugin.
- Go to "Tools" -> "Widget Importer & Exporter".
- Click on "copy and paste" link. Then a textarea will be displayed.
- Copy and paste the content in the "demo.themesdna.com-gridbone-pro-widgets.wie" file into that textarea.
- Click on "Import Widgets" button.
- First download and save this "gridbone-pro-export.dat" file into your hard drive.
- Now install and activate the "Customizer Export/Import" plugin.
- Go to "Appearance" -> "Customize" -> "Export/Import".
- Click on "Choose File" from the "Import" section and select previously saved "gridbone-pro-export.dat" file from your hard drive.
- Check the option "Download and import image files?" and click on "Import" button.
