Poedit is a software (available for Windows, Mac and Linux) which you can use to translate a theme or a plugin. Translating a WordPress theme with Poedit software is a straightforward process that enhances your site's accessibility to a global audience. Poedit is a user-friendly application that allows you to edit .po and .mo files, which are essential for theme translation. By extracting strings from your theme's code, Poedit enables you to provide translations for text elements, ensuring that your content resonates with users in their native language. This guide will walk you through the steps to efficiently use Poedit to translate your WordPress theme, making your site more inclusive and widely accessible.
What is the ".pot" file?
A ".pot" file contains a list of all the original texts (in English) that need to be translated. The .pot file is used as a starting point for new translations. Each of our WordPress themes has a ".pot" file in the "languages" folder. So the.pot file's path is: wp-content/themes/theme-name/languages/theme-name.pot
Step 1:
The first step is to download Poedit, a free piece of software that is compatible with operating systems such as Windows, MacOS, and Linux. After you’ve installed the Poedit software, you can start translating.
Step 2:
Locate the ".pot" file in the "wp-content/themes/theme-name/languages/" folder and copy it to your hard drive for editing.
Step 3:
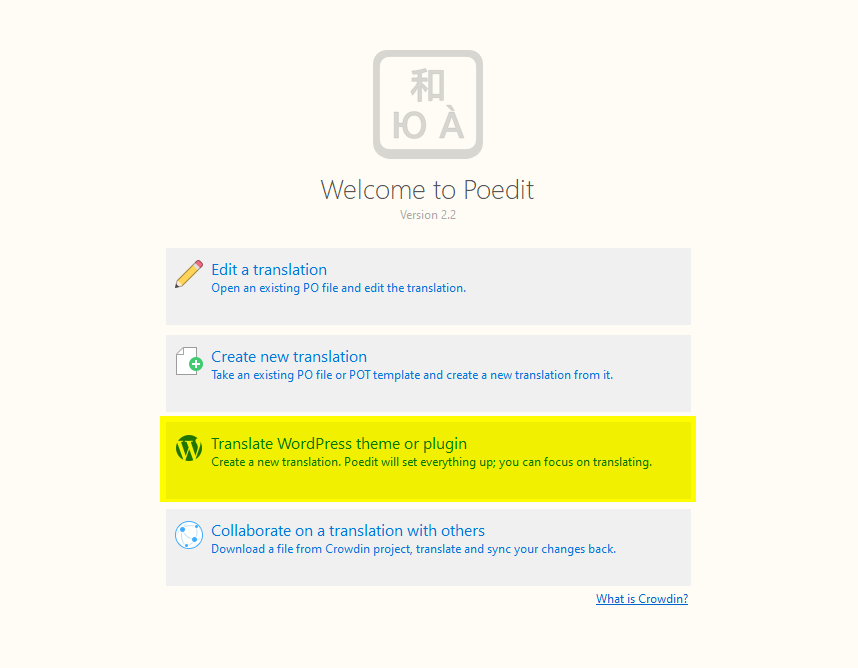
Open the Poedit software. You will see the options to either edit or create translation files.
Step 4:
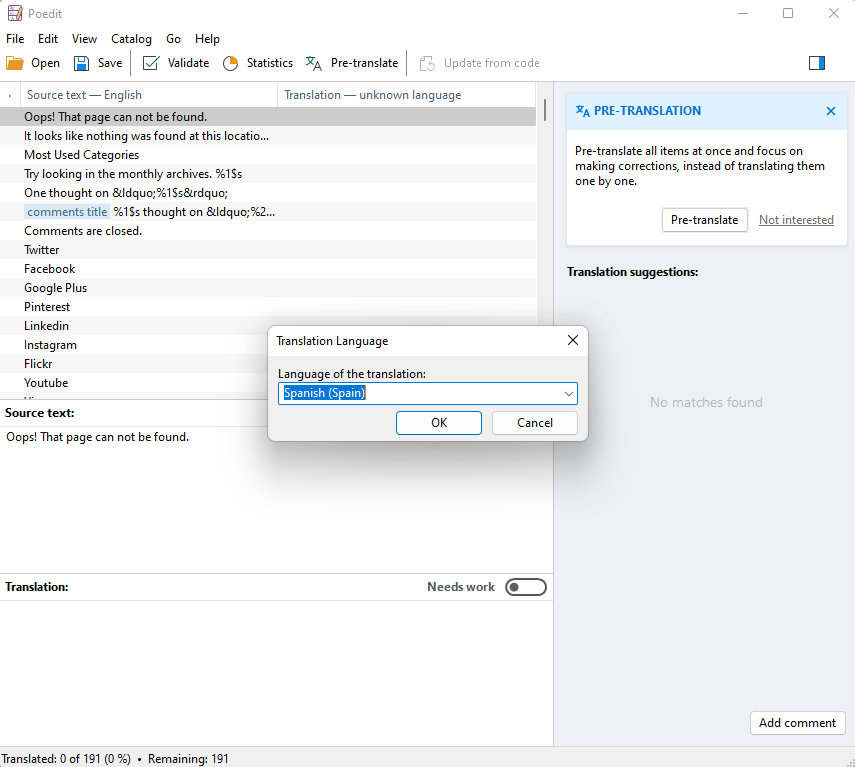
Click on the "Create new translation" option. Locate and open the ".pot" file that you previously saved to your hard drive. Now Poedit will ask for the "Translation Language". Select the language you want to translate the theme into from the drop down list and click the "OK" button.
In the below example, I select "Spanish (Spain)" as the translation language.
Step 5:
You will now see a list of all the strings (source texts) in the.pot file. To translate the theme, you need to click on each source text, then use the "Translation:" field at the bottom to enter your translation, or simply choose a word recommended by Poedit in the right side. Repeat this step for all the source texts you want to translate.
Note:
- You have to respect all special characters from the source text when translating (look at the screen capture)
- It is not necessary translate all source texts.
Step 6:
When you are done translating strings, go to "File" > "Save as..." and save your file as a ".po" translation file.
Note:
When you save it as a ".po" file, you should follow the naming convention based on the "language code" and the "country code". The first lower-case letters define the "language", whereas the second upper-case letters define the "country".
Examples:
When your language is "Spanish" and country is "Spain", .po file should be named as "es_ES.po".
When your language is "Portuguese" and country is "Brazil", .po file should be named as "pt_BR.po".
When your language is "German" and country is "Germany", .po file should be named as "de_DE.po".
When your language is "English" and country is "United Kingdom", .po file should be named as "en_GB.po".
When your language is "English" and country is "Sweden", .po file should be named as "en_SE.po".
You can check out here to find your language and country codes: https://www.gnu.org/software/gettext/manual/gettext.html#Language-Codes
With Poedit software, however, we do not need to remember this naming convention. Poedit will automatically name your .po file correctly. Because I selected "Spanish (Spain)" as the translation language in step 4, my .po file name should be "es_ES.po".
Step 7:
When you save the .po file, the .mo file will be generated automatically as a compiled version of .po file.
Upload both these ".po" and ".mo" files to the "languages" folder of your theme (wp-content/themes/theme-name/languages/).


