There are some situations where you cannot install a WordPress theme using the WordPress dashboard. One situation is when your theme's zip file is larger than the maximum upload size in WordPress. Then you can install a theme using cPanel's File Manager option.
It is easier than installing a theme using FTP. Follow the steps given below to install a theme using the file manager in cPanel.
1. Log in to your cPanel account. Your cPanel URL will be https://yourdomain.com/cpanel or a similar URL.
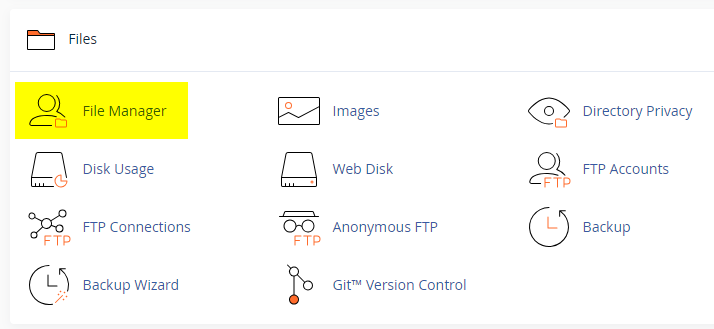
2. Click on the "File Manager" icon. It's usually under the "Files" section.
3. You are now in the "File Manager". Open the "public_html" folder, which is your website's root directory.
4. Locate the "wp-content" folder inside "public_html," then open the "themes" folder inside of it.
5. In the File Manager interface, click the "Upload" button and choose the theme's .zip file from your local drive.
6. After it has been uploaded, right-click the .zip file and choose "Extract" or "Unzip".
7. You can now delete the uploaded .zip file, but it's optional.
8. Log in to your WordPress dashboard through your web browser.
9. Go to Appearance -> Themes. Now you will see the newly extracted theme.
10. Make it your active theme by clicking the "Activate" button next to it.